Renter-Friendly Composting: No-Install Methods
By Priya Nandakumar • 19th Mar
Living in a rental doesn't mean you have to send food scraps to the landfill, but it does mean your composting setup needs to respect your landlord's rules, leave zero damage, and fit in a closet or cabinet. Renter-friendly composting and lease-compliant compost solutions exist precisely because standard tumblers and outdoor bins require installation, permanent placement, or fixtures you can't take back when you move. The good news: the easiest systems for renters work best when they're minimal. No tools. No digging. No tenant disputes.
Why Renters Face a Different Composting Reality
As a former operations lead, I spent three years tracking which household systems actually stuck, and which ones died after two weeks. Composting is a prime casualty. Most renters abandon it not because they don't care about waste, but because their setup was too rigid or demanded daily attention. I once quit composting for six months because a fussy worm bin setup stole my evenings; the learning curve on moisture, temperature, and bedding management turned something joyful into a source of guilt.
Renters face specific obstacles that homeowners skip over: lease restrictions (no outdoor structures), portability (you move every 3-5 years), pests in close quarters (raccoons, rats, fruit flies in apartment buildings), and space scarcity (no yard, maybe a small balcony). Any system you choose must be removable, odor-free, and compact enough to store inside or on a shared patio without triggering complaints from neighbors or your landlord. For apartment dwellers, see our smell-free apartment compost storage guide for low-odor caddies and bins that won't upset neighbors.
The path forward isn't heroic effort; it's choosing a method that fits your life for 15 minutes a week.
The Two No-Install Pillars: Worm Bins and Countertop Composters
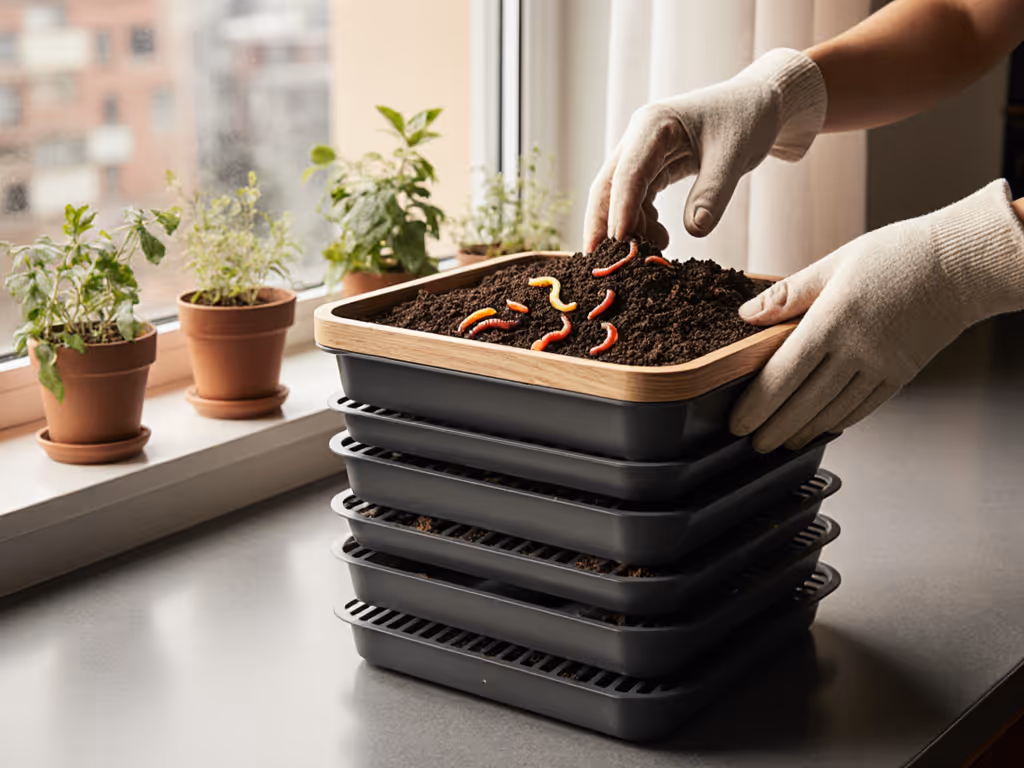
Worm Bins (Vermicomposting)
Worm composting, or vermicomposting, uses red worms to convert food scraps into finished compost in a sealed bin that sits under a sink, in a closet, or on a balcony. Because it's contained, odor-free, and produces a valuable byproduct (worm castings, a mild fertilizer for houseplants), it ticks nearly every renter box. The system is portable, requires no landlord permission, and won't damage walls or siding.
How it works in practice:
- Add food scraps to the bin once or twice a week (5 minutes).
- Worms break down the material over weeks to months.
- Drain excess liquid as needed (2 minutes).
- Harvest finished castings every 3-6 months (10-15 minutes).
The catch: The setup phase requires a learning curve. You need the right type of worms (red wigglers, not earthworms), proper bedding (shredded paper, coco coir, aged compost), and moisture balance. Too wet, and it smells. Too dry, and worms die. Too cold, and the population crashes. Many renters buy a bin, add worms, and panic when they see fruit flies or notice a sour smell, which is exactly why five-minute fixes beat heroic composting every single time. A moisture-control fix is usually just draining the bin or adding dry bedding.
Best for: Small to medium scrap volumes (1-2 people), indoor or sheltered outdoor placement, and someone willing to spend an afternoon learning the fundamentals.
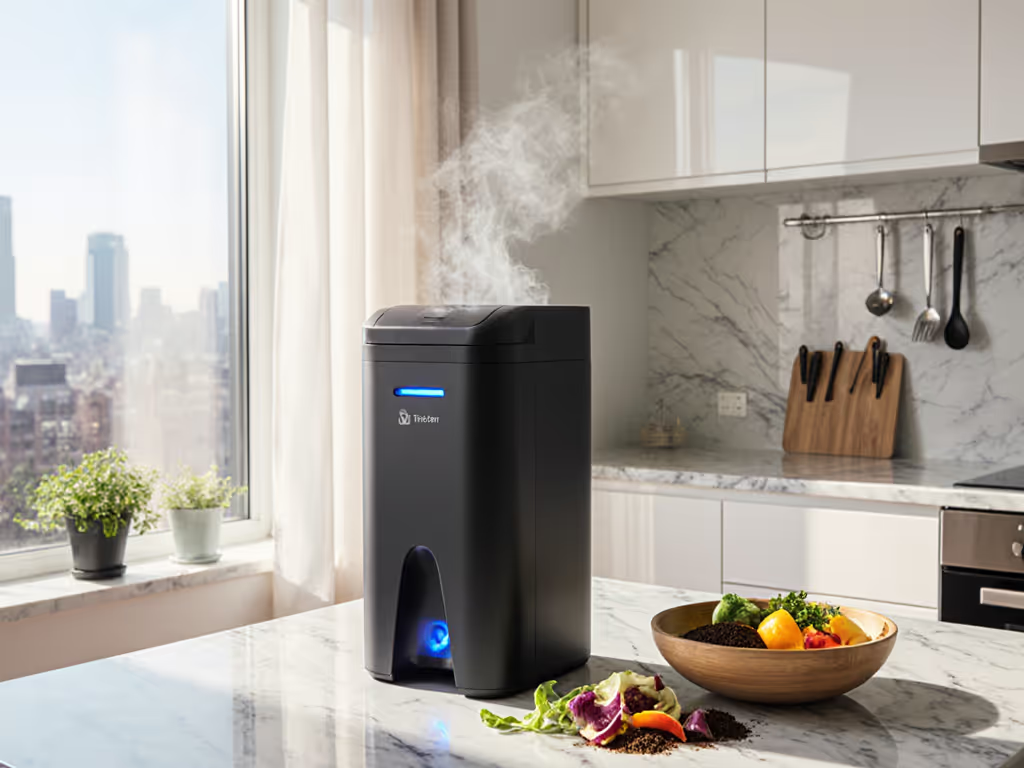
Countertop Composters
Countertop composters (also called electric or non-electric aerobic bins) are compact containers that sit on your kitchen counter and use heat, air, or fermentation to break down food scraps in weeks rather than months. If you're considering plug-in units, read our indoor electric composter guide for pros, cons, and ideal use cases. No worms, no smell (when working correctly), no digging into the soil.
How it works in practice:
- Toss food scraps into the lid (daily habit, 1 minute).
- Press a button or stir occasionally (3 minutes per week).
- Empty finished material into a bag or garden bin every 2-4 weeks (5 minutes).
The catch: Many non-electric versions require adding brown material (shredded paper, sawdust, activated charcoal) each time you add scraps. This is the step renters often skip because they don't have browns on hand, which leads to smell and regret. Default to easy means choosing a system where browns are built-in or minimal.
Best for: Those who want speed, don't have space for a worm bin, and can source or buy browns (often sold as compost additive packets).

Matching Your Setup to Your Constraints
Choosing the right system isn't about which one is "best"; it's about which one you'll actually use for 52 weeks.
Space
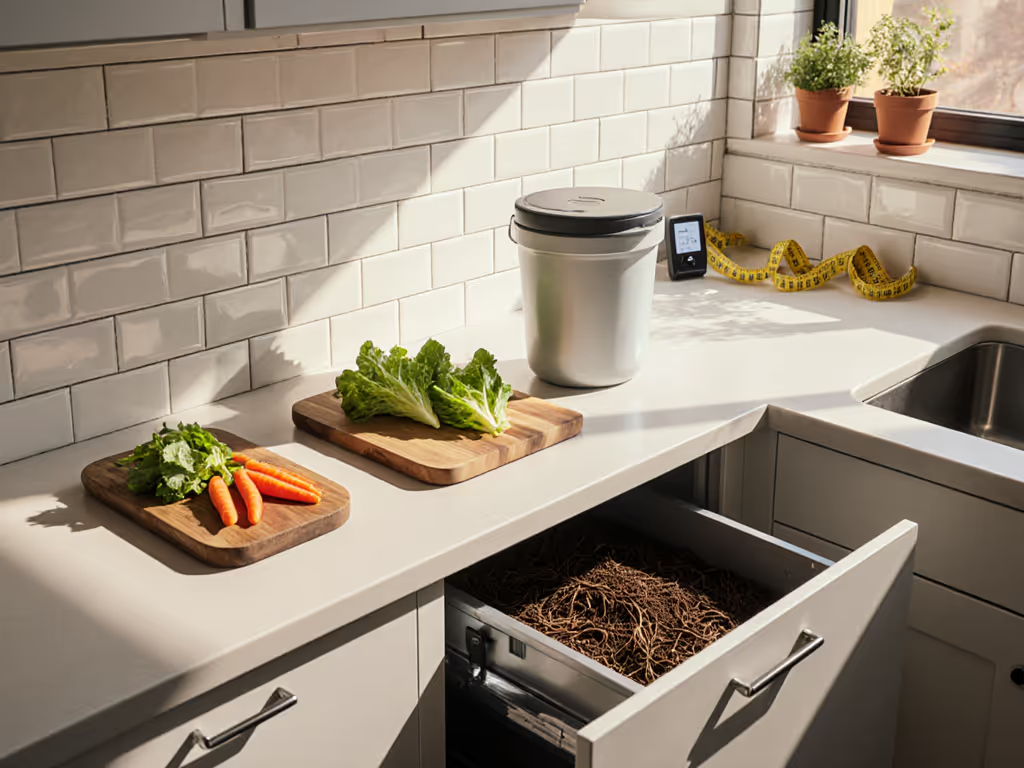
- No yard, small balcony, or indoors only: Worm bin (under sink, closet, on floor) or countertop composter (kitchen counter, bathroom floor).
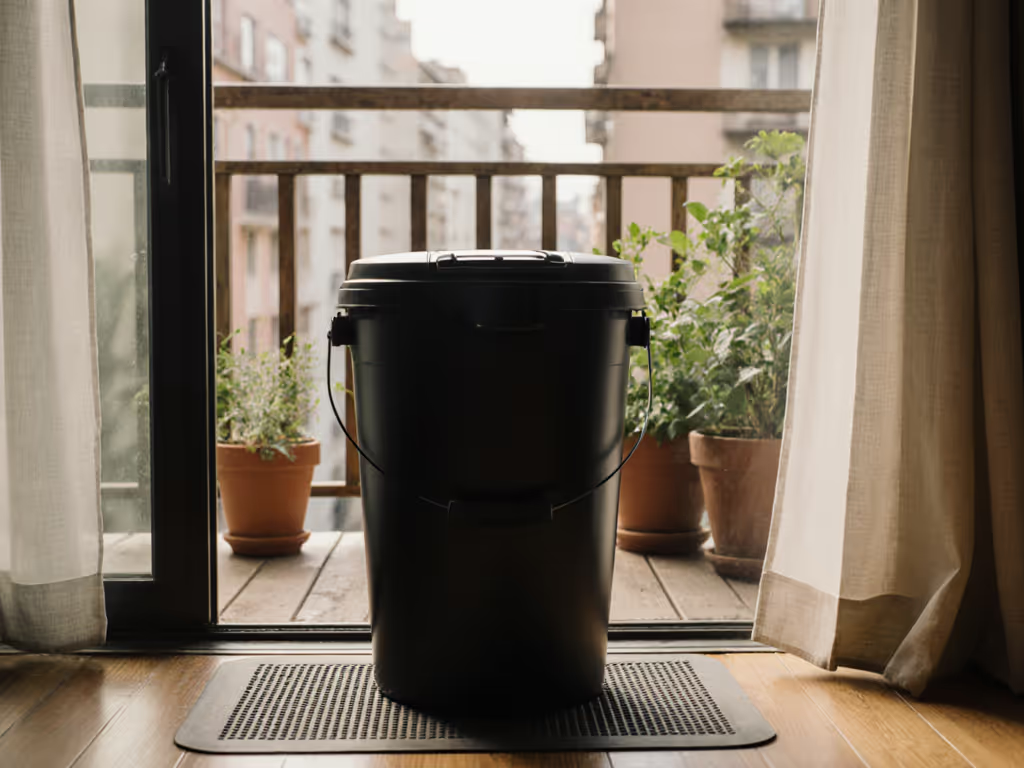
- Shared outdoor patio: Worm bin in a discrete location; some renters buy a decorative storage box and place the bin inside to avoid HOA or landlord pushback.
Scrap Volume
Estimate your weekly food scraps. A household of 1-2 people generates roughly 2-3 pounds per week (mostly vegetable peels, coffee grounds, crushed eggshells). A small worm bin handles 3-5 pounds weekly; a countertop composter handles 2-4 pounds weekly before needing to be emptied.
If you overfill, the system floods or smells (a real pain when you're mid-lease and can't show odor issues to your landlord).
Lease Compliance
Before buying anything, read your lease for language around composting, outdoor structures, or food storage. Ask your landlord directly if you're unsure. Most allow indoor worm bins and countertop composters because they're portable and don't alter the unit. Outdoor tumblers are a gray zone; many landlords forbid them because they require permanent placement or attachment.
Step-by-Step: Setting Up Worm Composting in 30 Minutes
What You Need
- A worm bin kit or two plastic storage bins (one for nesting, one for harvesting).
- Red wiggler worms (from a specialty supplier or gardening store).
- Bedding: shredded newspaper or junk mail, coco coir, or pre-made worm bin bedding.
- A small bag of finished compost or aged potting soil (to inoculate the bin with microbes).
- A spray bottle and a strainer.
The Setup
Minute 1-5: Prepare the bin environment. If using a DIY two-container system, drill 12-15 small holes (1/4 inch) in the bottom of one bin and place it inside the other (which catches liquid). Add 4-6 inches of moist, shredded bedding to the top bin. Bedding should feel like a wrung-out sponge, damp but not dripping.
Minute 6-15: Add worms and starter material. Place 1 pound of red wigglers (roughly 1,000 worms) on top of the bedding. Spread a thin layer of aged compost over the worms. Add a handful of food scraps (small pieces, no meat or dairy). Cover with another 2 inches of bedding. The worms will bury themselves within a day.
Minute 16-30: Label and place. Label your bin with the date and contents. Place it in a cool, dark spot: under a sink, in a closet, on a sheltered patio, or even in a basement corner. Keep it away from direct heat or cold (ideal temperature: 55-77 F). Check it in three days to ensure worms are active (they'll be burrowing) and no smell is present.
Step-by-Step: Setting Up a Countertop Composter
What You Need
- A countertop composter (electric or non-electric).
- Browns (if not electric): bags of composting additive, shredded paper, or sawdust.
- A food scrap container or caddy for your counter or under the sink. Compare top options in our odor-free countertop caddy picks to keep smells down between runs.
The Setup
Minute 1-5: Unbox and read the manual. This step matters. Each model has a different moisture sweet spot and brown-to-scrap ratio. Read it once, keep it nearby.
Minute 6-10: Load the bin. Add a base layer of the composting additive or shredded paper. Place the bin in a well-ventilated spot (away from a direct heat source or window).
Minute 11-15: Test a batch. Chop one day's worth of food scraps into small pieces (roughly pea-sized; larger pieces decompose more slowly). Add them to the bin, top with a layer of additive, and activate the unit (if electric, press the button; if not, stir or let it sit). The bin should feel slightly warm or smell neutral, not sour.
Daily habit (1 minute): Toss scraps into a kitchen caddy. When it's full, dump it into the composter and add browns if required.
What to Compost and What to Avoid
Yes (Greens)
- Fruit and vegetable scraps, fruit peels, eggshell interiors, coffee grounds, tea leaves, crushed eggshells.
Careful
- Onions and garlic (small amounts only, worms dislike strong acids).
- Citrus peels (small amounts; they slow decomposition).
- Oils and fats (tiny amounts; they attract pests).
No
- Meat, fish, dairy, or oils (attract rats, raccoons, and flies in apartment settings).
- Pet waste.
- Diseased or treated plants.
- Glossy paper or cardboard (stick to plain newsprint).
Troubleshooting: Five-Minute Fixes
Smell (sour, rotten, ammonia): Too wet or too much protein. Fix: Add dry browns (shredded paper, activated charcoal), stir, and leave the lid off for an hour if possible. Drain excess liquid if it's pooling.
Fruit flies: Uncovered food or too much moisture. Fix: Bury scraps under 2 inches of bedding or browns. Reduce moisture. Cover the bin tightly. Fruit flies take 7-10 days to die off. For recurring odor or pest issues, use our neighbor-friendly troubleshooting guide tailored to small spaces.
Worm die-off (dead worms, foul smell, no activity): Temperature shock, extreme moisture, or starvation. Fix: Check temperature (aim for 55-77 F). Adjust moisture if the bin is soggy. Add fresh food and bedding in a new, unused section of the bin to give worms an escape route.
No decomposition (scraps still visible after 3 weeks): Too cold, too dry, or worms are stressed. Fix: Move the bin to a warmer spot. Mist the bedding lightly. Add a small handful of new worms if the population has crashed.
A System That Actually Lasts
I timed every task in my household's composting routine, then switched to a simple two-chamber tumbler with a caddy and carbon reminder. That switch saved eighteen minutes a week and transformed composting from "the bug box" (my kids' dreaded term) to something we could sustain year-round. The lesson: if you're spending more than 15 minutes a week on composting, your system is too complicated for renter life.
Both worm bins and countertop composters can work that way, provided you:
- Choose based on your space and scrap volume, not on greenwashing.
- Read the instructions before you start.
- Keep a troubleshooting cheat sheet taped to the bin.
- Set a phone reminder for feeding day (once or twice weekly, 5 minutes total).
Your Next Step
This week, take 10 minutes to audit your situation: How many people in your household? What's your weekly food-scrap volume (save scraps for three days and weigh them). Do you have indoor space, a balcony, or yard access? What does your lease say about composting?
Once you have those answers, choose one method and buy a kit. Don't research for six months. Renters who delay often never start. Pick a worm bin or countertop composter, place your order, and set an onboarding date. Most systems show results (reduced trash, finished material, or visible worm activity) within 2-3 weeks. That feedback is what cements the habit.
Default to easy. Start small. Scale only if your household and lease allow it. You've got this.
Related Articles